
2 月 . 15, 2025 20:26
Back to list
bread in oval dutch oven
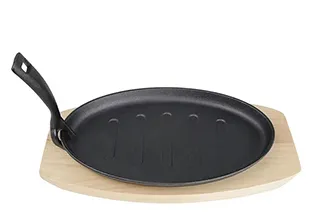
Few experiences in home baking are as rewarding as pulling a golden-crusted loaf from an oval Dutch oven. The bread's rustic appeal is undeniable, and its taste—slightly nutty, with a tantalizingly crisp crust—places it in a league of its own. If you’re seeking to master this art, it begins with understanding the dynamics of this versatile kitchen staple and how it transforms the humble loaf into a gourmet delight.
Proofing is another critical phase, demanding patience and a keen eye. In cooler climates, this can take longer, while a warm kitchen can speed things up. The key is observing the dough. It should roughly double in size and not be sticky when you touch it lightly. Before baking, preheat your oval Dutch oven to ensure it's up to temperature. This mimics the environment of a professional bread oven and is essential for that burst of oven spring—the initial rise that occurs when dough hits the hot environment. Place your dough in the preheated Dutch oven and score it quickly yet confidently. This score guides the dough’s expansion and ensures an even rise. Bake with the lid on initially. This traps steam, creating a moist environment that promotes a shiny, robust crust. Removing the lid near the end of baking allows the crust to develop its full color and crunch. Timing here is pivotal; too long, and the loaf dries out, too short, and it remains undercooked. Once baked, patience is again required. Allow the bread to rest before slicing. This cooling period lets the crumb set, preventing a gummy interior. Mastering bread in an oval Dutch oven elevates your home baking, showcasing a combination of art and science. The oven’s legacy, paired with precise techniques and quality ingredients, not only delivers superior bread but also deepens your connection with culinary history. Whether you're a seasoned cook or novice baker, this practice encourages a deeper appreciation for craftsmanship and the simple, yet profound, act of baking bread.
Proofing is another critical phase, demanding patience and a keen eye. In cooler climates, this can take longer, while a warm kitchen can speed things up. The key is observing the dough. It should roughly double in size and not be sticky when you touch it lightly. Before baking, preheat your oval Dutch oven to ensure it's up to temperature. This mimics the environment of a professional bread oven and is essential for that burst of oven spring—the initial rise that occurs when dough hits the hot environment. Place your dough in the preheated Dutch oven and score it quickly yet confidently. This score guides the dough’s expansion and ensures an even rise. Bake with the lid on initially. This traps steam, creating a moist environment that promotes a shiny, robust crust. Removing the lid near the end of baking allows the crust to develop its full color and crunch. Timing here is pivotal; too long, and the loaf dries out, too short, and it remains undercooked. Once baked, patience is again required. Allow the bread to rest before slicing. This cooling period lets the crumb set, preventing a gummy interior. Mastering bread in an oval Dutch oven elevates your home baking, showcasing a combination of art and science. The oven’s legacy, paired with precise techniques and quality ingredients, not only delivers superior bread but also deepens your connection with culinary history. Whether you're a seasoned cook or novice baker, this practice encourages a deeper appreciation for craftsmanship and the simple, yet profound, act of baking bread.
Previous:
Latest news
-
Extra Large Round Cast Iron Griddle - Heavy Duty Griddle Plate for Even Heating & Versatile CookingNewsJun.10,2025
-
Top Brands of Cast Iron Cookware Durable & Versatile Cast Iron Skillet BrandsNewsJun.10,2025
-
Enamel Coated Cast Iron Pot Durable, Non-Stick & Even Heat CookingNewsMay.30,2025
-
2 Quart Dutch Oven Durable Cast Iron, Even Heating & VersatileNewsMay.30,2025
-
Best Chinese Wok Price Authentic Iron Pans, Fast Shipping & DealsNewsMay.29,2025
-
Non-Stick Cast Iron Skillet with Lid Durable & Easy-Clean PanNewsMay.29,2025


